Deploy on AWS
Deploy the AI Platform virtual appliance on AWS by launching an EC2 instance from the appliance AMI.
Before You Begin
- Log in to the AWS account where you want to deploy the appliance.
- Confirm that your AWS account has permission to create EC2 instances.
- Choose the AWS region where your scan targets are located.
- Contact your AWS administrator if you need help with AWS permissions, networking, or security group settings.
Deploy the appliance in the same AWS Region as the targets you need to scan. If your targets are in multiple Regions, deploy one appliance in each Region.
Find the Appliance Image
The appliance image is available as an AMI (Amazon Machine Image) for deployment in your AWS account.
Contact the Latticeflow support team to retrieve the appropriate AMI identifier. You will use this identifier when selecting the AMI during instance launch.
Open EC2
- Open the AWS Console.
- Navigate to All Services → Compute → EC2.
- Select Launch Instance.
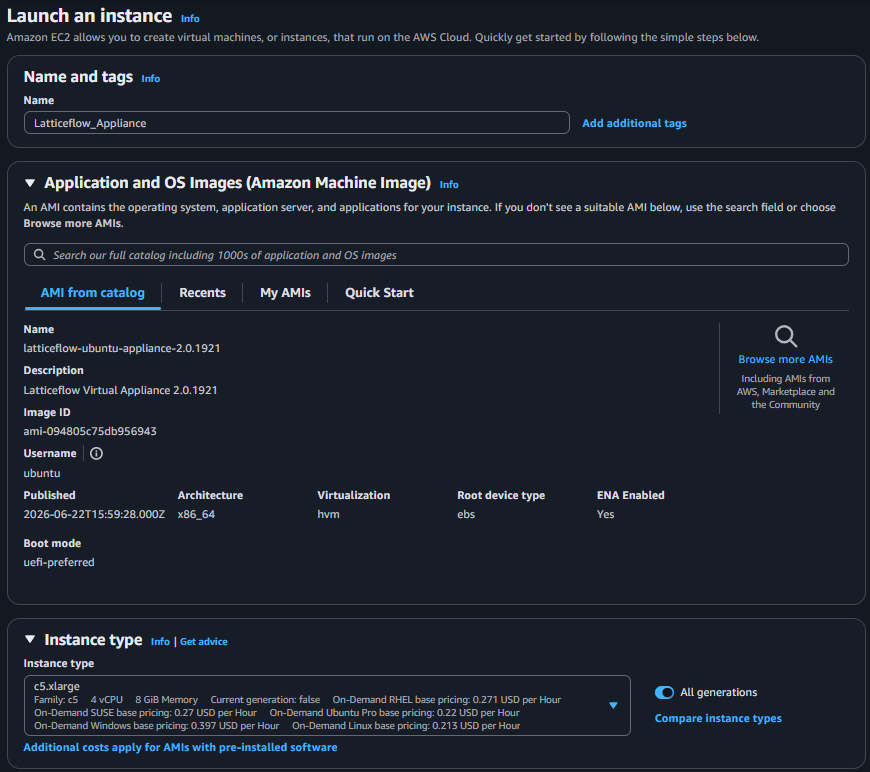
Select the Appliance AMI
- Search the community AMIs for the AMI identifier provided by the Latticeflow support team.
- Locate the correct appliance AMI.
- Select Select for that AMI.

Choose an Instance Type
Choose an instance type for the appliance.
Latticeflow recommends a minimum of:
| Resource | Minimum |
|---|---|
| CPU | 4 cores |
| Memory | 8 GB RAM |
| Disk | 64 GB |
Use an instance type with at least 4 vCPU and 8 GiB RAM. For example, c5.xlarge matches these minimum requirements.
Select a Key Pair
Select the key pair to use for the instance.
You can choose an existing key pair or create a new one. If you create a new key pair, save the PEM file because you need it to connect to the appliance console.

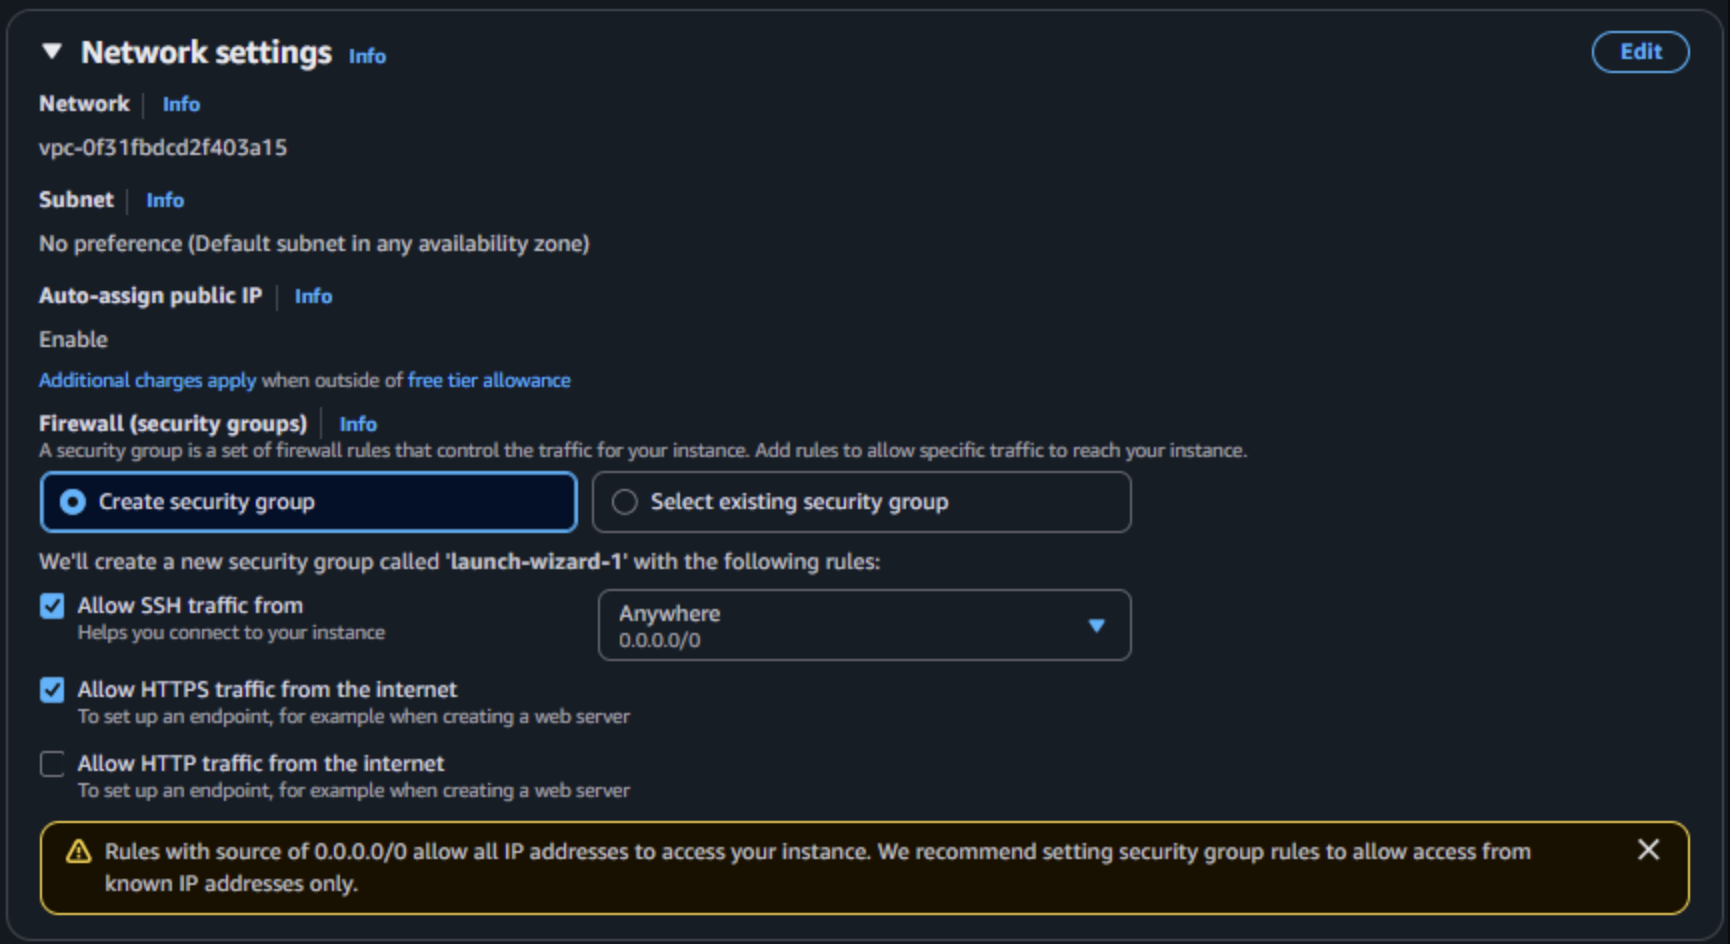
Configure Instance Networking
Configure the network settings for the appliance:
- Select the appropriate Network.
- Select the appropriate Subnet.
- Configure Network Interfaces.
Direct access to the Appliance UI is required for registration and licensing. Choose one of these access methods:
- Public access: Enable Auto-assign Public IP to access the Appliance UI through a public IP address.
- Private access: Use the auto-assigned private IP address. Your network must be able to reach the private IP address, for example through a VPN connection to the cloud instance.
Consult your AWS team to confirm the required security group settings. At minimum, allow access to port 22 and port 443 for the Appliance UI.
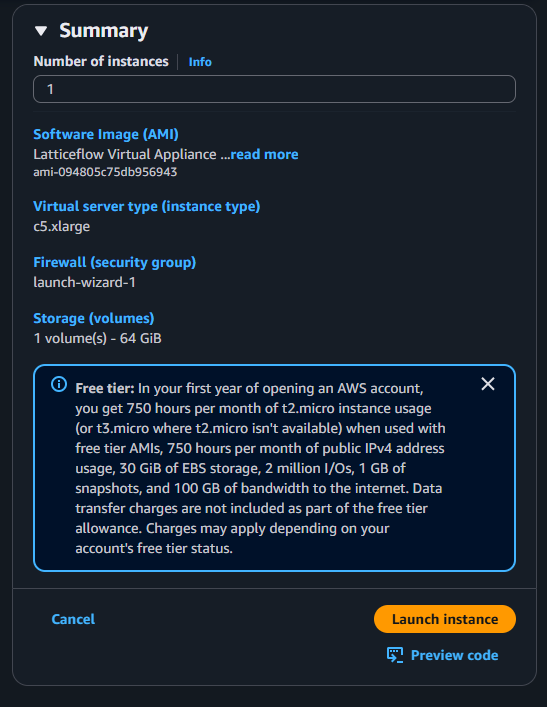
Step 7: Configure Storage
Set the storage size to at least 64 GB.

Review and Launch the Instance
- Review the instance configuration.
- Select Launch instance.
Get the Appliance IP Address
After the appliance boots for the first time, find the appliance IP address in AWS.
- For public access, use the public IP address.
- For private access, use the private IP address from a network that can reach the appliance.
Use this IP address to log in to the server.
Next Step
The appliance is now deployed. Next, configure the virtual appliance.